Editing the Layout of a duplicated report
![]() Updated
by
Cheryl Wallace
Updated
by
Cheryl Wallace
The Layout tab determines how data will appear on the report page. It also determines how the data is grouped and whether there are totals. This is where you change the format.
Different actions to modify the look of the final report are described below
Move a column | Works only with columns in the Detail band or Group Headers. The Report footer and Group Footers are aligned with the Detail Band and any Group Footers are aligned with the corresponding Group Header on these columns.
|
Increase or decrease the width of a column | Most frequently this will be used to increase the number of default columns to span to prevent word wrapping on long text field columns.
|
Change the date format | Override the default date format to use your preferred date format such as yy-MM-dd, yyyy-MMM-dd, yyyy-MM-dd hh:mm tt, or dddd, dd MMMM yyyy HH:mm:ss. Other options are d for short date, D for long date, f for long date + short time, F for long date + long time, g for general (short), and G for general (long). Removing a manually entered date format will return to the default date format.
|
Use the Currency format | Use the Currency symbol for any currency field.
|
Add a blank line in the Detail band to increase readability |
|
Remove a detail row to condense a report |
|
Remove a Group Header | Group headers are numbered. Group headers can only be removed if there are more than 1. When removing a Group header, the corresponding Group footer is also removed.
|
Add a Group Header | Generally the Sorting order needs to support the same levels of Groups on the report. Group headers start at 1 to match the first Sorting order. Additional Group headers will be numbered sequentially but appear above the last group.
|
Add a blank row to a Group Header |
|
Move a column from the Detail Band to the Group Header |
|
Add a Total to a Group footer |
|
Add a Total to a Report footer (report total) |
|
 to save the changes and update the Layout view.
 to the left in the grey zone of the Detail band.
 to the right of the row.
 to the left of Group Header(s). A new blank row will be displayed. A Group footer is also added at before the Report footer, mirroring the Detail band.
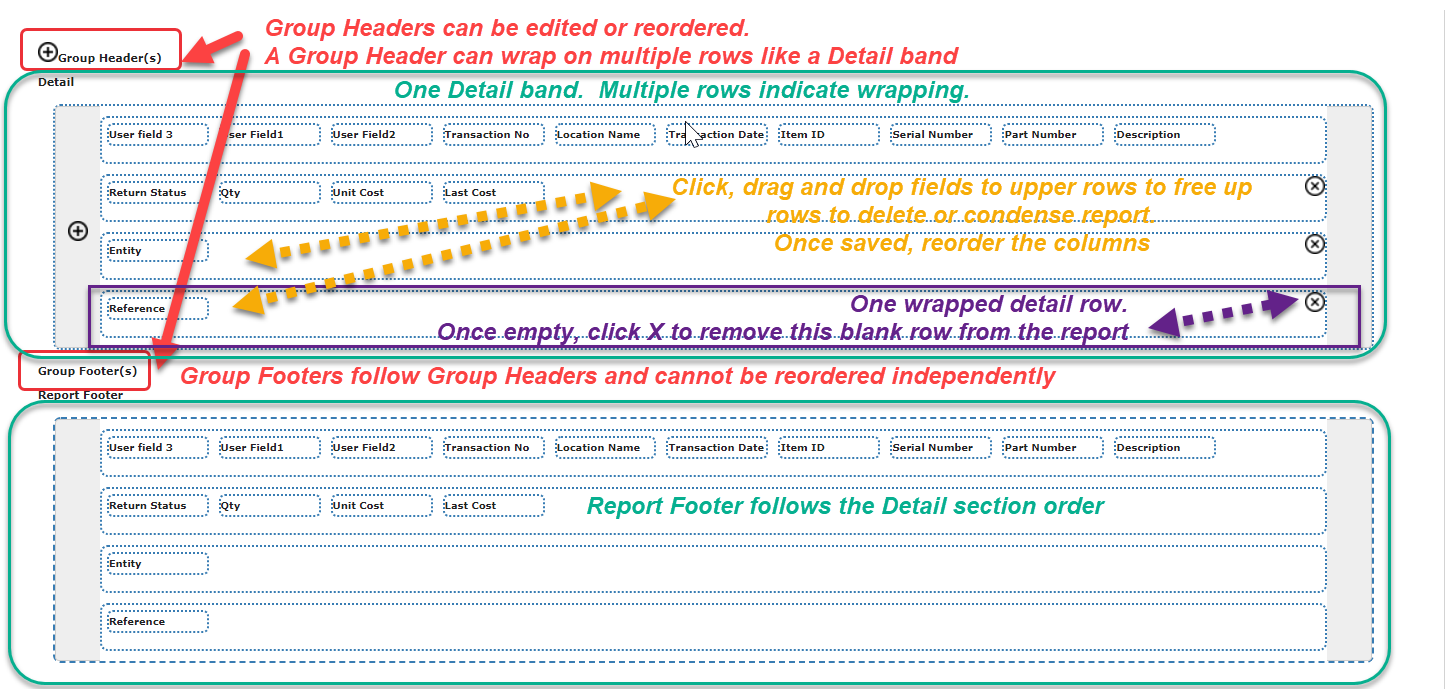
See also:
- About Customizing Reports
- Duplicating a Report
- Modifying the Columns on a duplicated report
- Changing the Sorting on a duplicated report
- Customizing the Filtering on a duplicated report
- About Reports
- Running Reports
Copyright © 2020-2026 ToolHound Inc. All Rights Reserved.